
No doubt, black and white photography is a lovely experience. It takes you to a different feeling. I prefer to convert many of my photos to B& W.
But before we dive into the topic, I heard people called black and white photos also Monochrome. So it is essential to know what Monochrome is, To simplify it, Monochrome is an image with different amount of light, but within one colour, that’s why it could be sepia, green, yellow or cyan. So, Black and white image is Monochrome, but, Monochrome is not necessarily black and white. Just a quick note.
When to go for B& W?
In my opinion, there are many factors where it is better to convert your image to Black and white.
1. When there are no interesting colours in the scene.
Sometimes you go to shoot a landscape, seascape or cityscape photos but you either miss the golden colour, or you get it cloudy. In such a case, you certainly won’t get any beautiful colour in the sky. Thus, my advice is to convert your image without thinking into B& W.

2. When the light is so harsh.
If you shoot at the middle of the day, you for sure will be losing the interesting colour at this time of the day. Besides, the harch light will create a kind of high-contrast between the tones. Such contrast is a great opportunity to make a good black and white image.

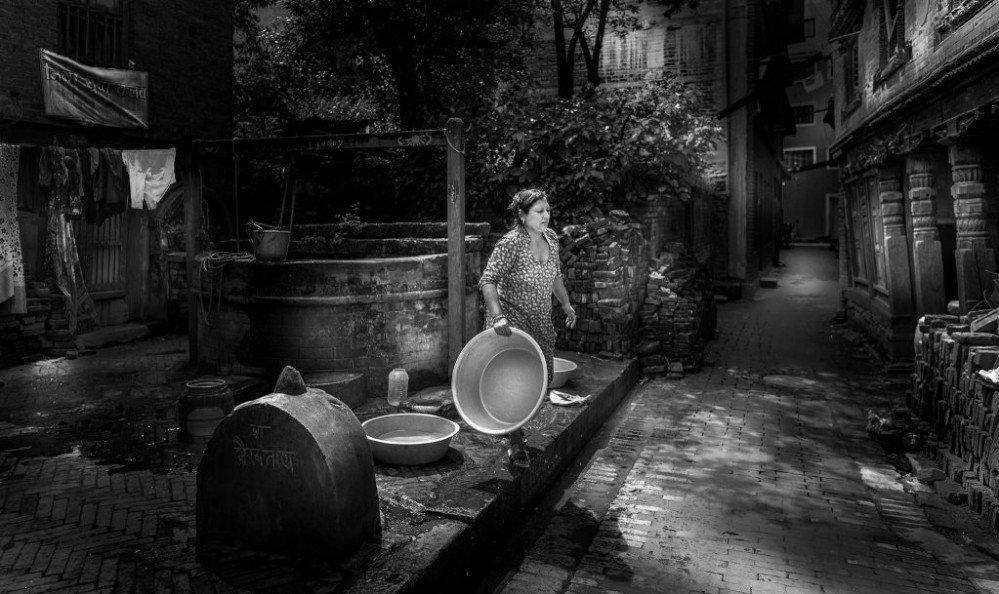
3. If colours distracting.
If you shoot an exciting scene and you found many colours, especially in street life photography, that colours annoying the eyes and distract it from the main subject. You may play around the colours and try to fade off them, but most of the cases you will find yourself converting the photo to B&W to keep they eye focusing on the main object.
4. When you plan for it in advance.
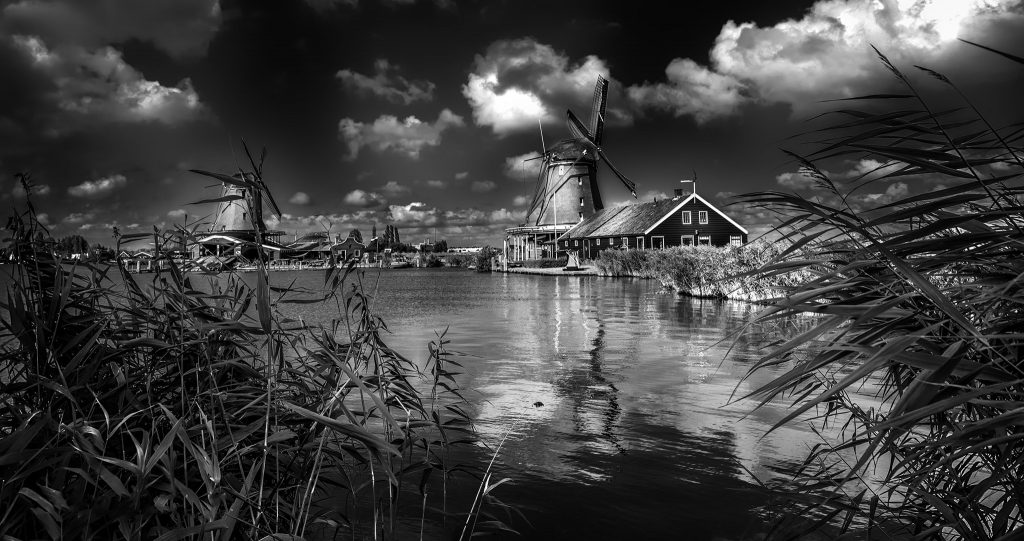
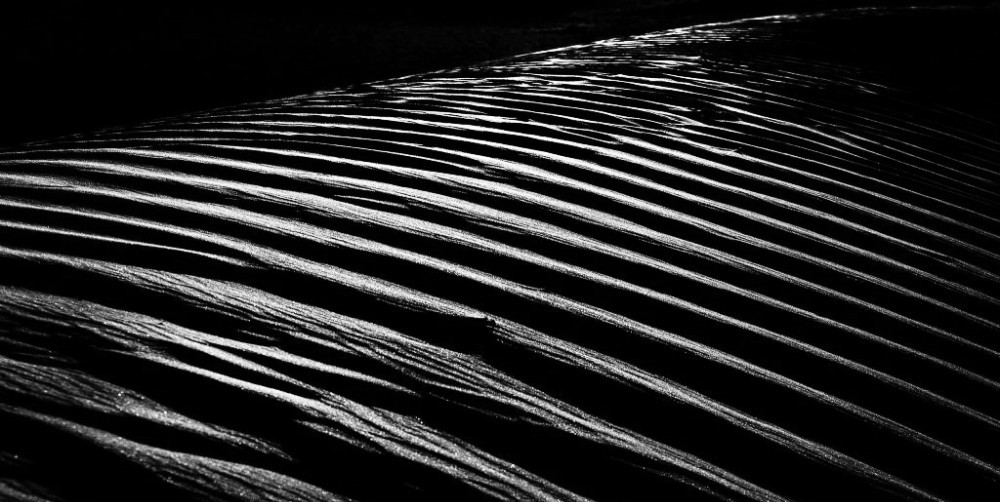
When you get genuinely into B& W, you will fall in love with it. Once you know what to shoot, when to shoot and how to shoot with extra knowledge of B& W post-processing, you will reach to a level I would say” you now can see in Black and White”! Sound interesting isn’t it? Yes, you will.That is why you will pick your gears, and you will intentionally go for Black and white shots when you photograph Texture, Shapes, abstract, patterns, portrait or you want to create a dramatic landscape or seascape photos.

Black and White long exposure.
Long exposure plays a critical role in black and white photos, mainly when the scene includes either clouds or water or both together. The stretchy clouds and the silky water create a fine art photo. below are two pictures from Bukhara Lake in Nepal,

The above image has been taken with shutter speed 1/125 s
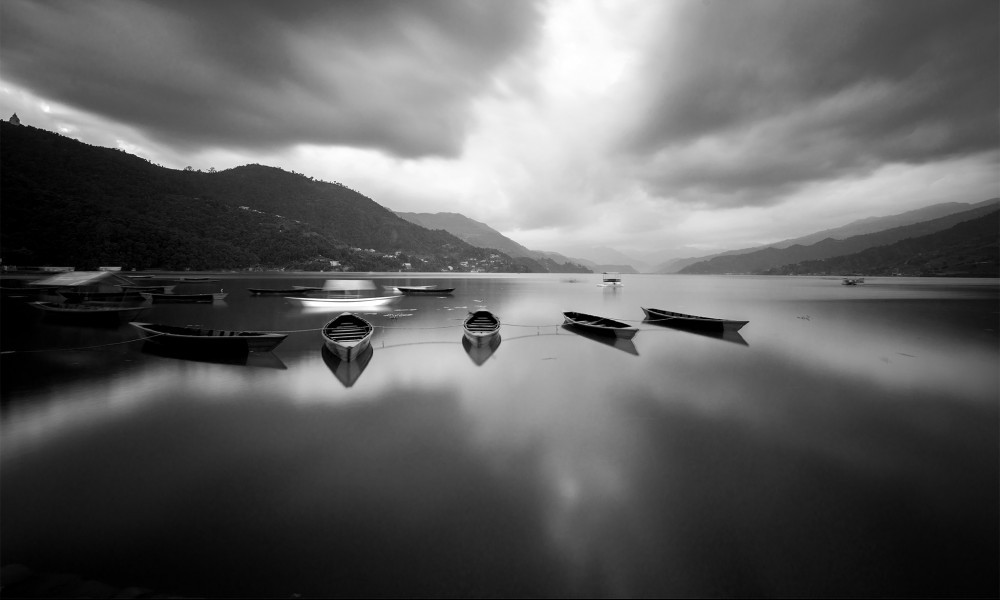
The above image has been made with a shutter delay of the 30s using ND filter
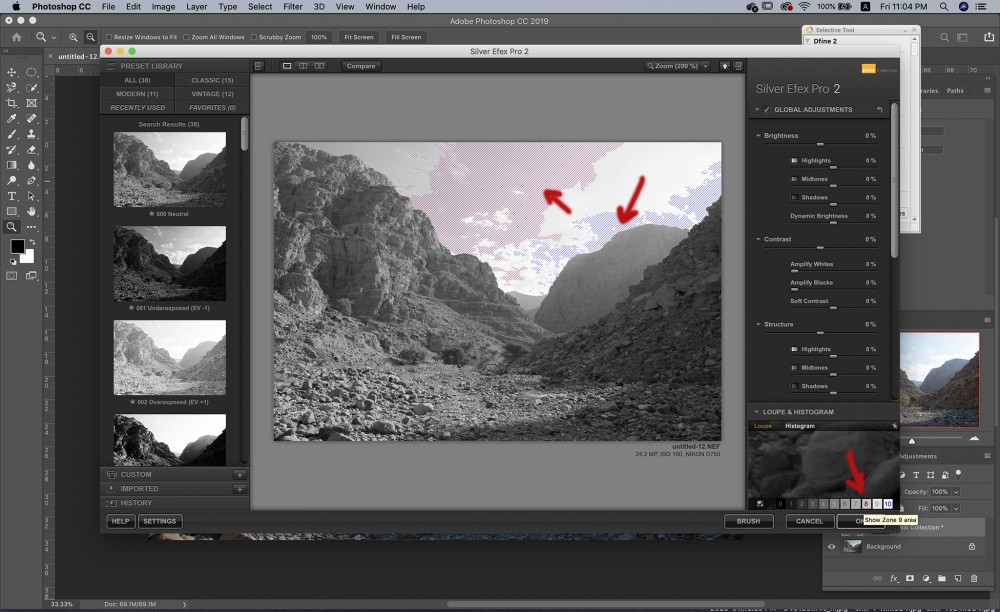
The Zone System.
Ansel Adams developed the zone system with Fred Archer in 1940. the system divides any scene into zones or sections according to the amount of lights and shadows within each area to enable the photographer to optimize the exposure during the image capturing and printing. The system has eleven zones from the pure Black to the pure white and in between the different grads of the grey referred to by the zone numbers. Which could be adjusted locally or independently (see the below image).
Post-processing Black and White image.
We can use any of the available software in the market like Photoshop, lightroom, Luminar4 which includes the Tonality Pro and finally Silver Efex Pro 2 for Nik collection.
Let’s see how to do that in different ways using the various software we mentioned and what the outcomes are.
Lightroom
Since I like to make the basic adjustments on LR, so, after converting the image into Black and White I edit it in two steps;
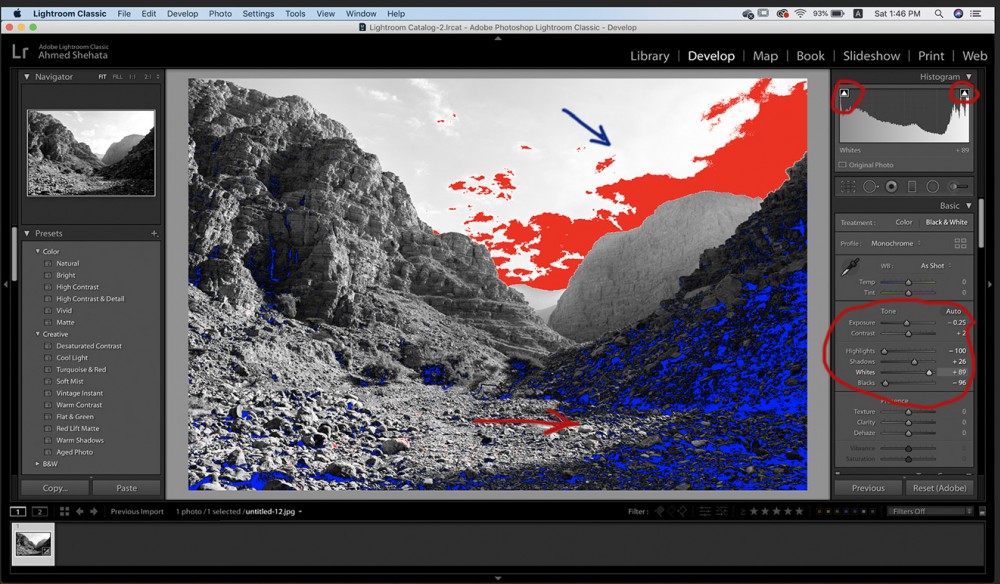
1. Using the Tone sliders:
I use the Tone sliders to adjust the three areas of tones, the Mid-tones using the exposure slider, which is ok as per the below photo, if you press (J), LR will show the white area in Red and The Black area in blue accordingly you can push the sliders in both to the end until you get the below result. Once you get there, it is the time to regain the details in the bright and the dark areas by the shadow and the highlight sliders as per the below picture. Now you have a kind of balance between the white, the black and the shadow.
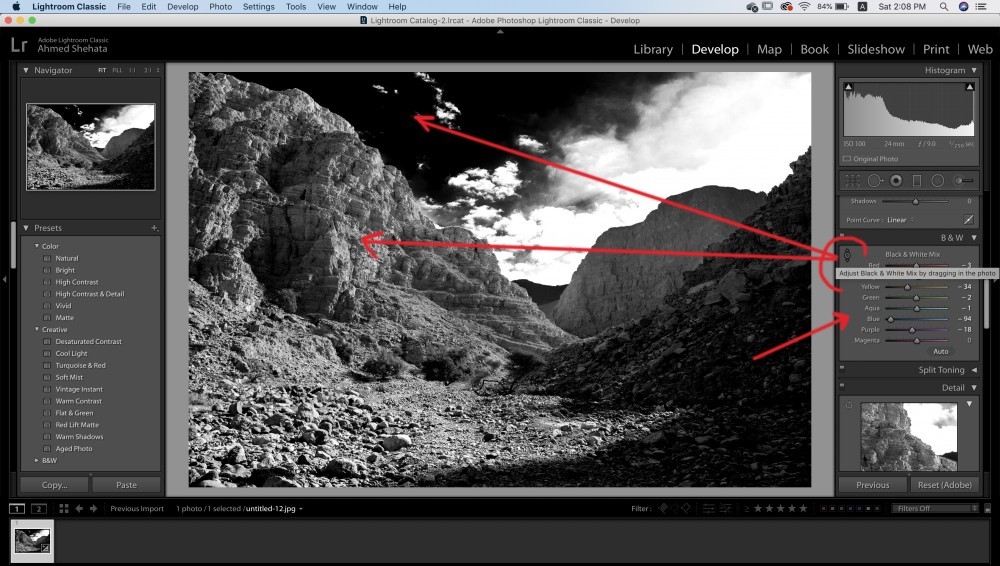
2. The Black & White Mix
I use the (Black & White Mix) sliders to adjust the colour tones. Remember that the file contains the colour information, which means every colour will be represented differently in Black& White. So I Advise you to play around with these sliders. The good thing about the B& W Mix is the control over the image and the further improvement and drama it adds to the scene. Check the below picture and see how the sliders emphases the tone of the blue sky, the clouds and the mountain on the left side.
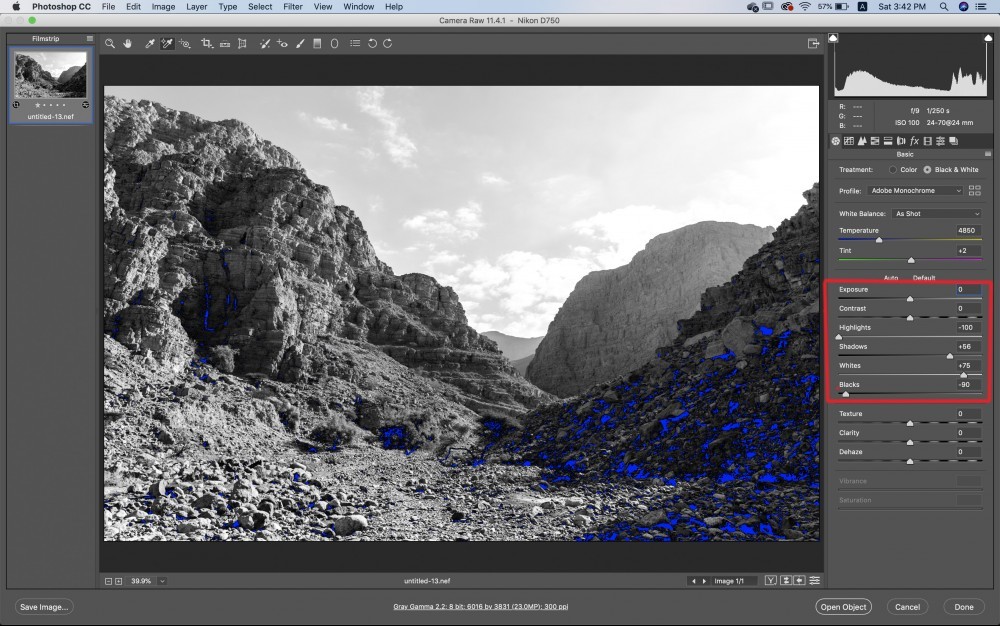
Photoshop(Camera RAW)
The same steps you can follow with PS camera RAW if you don’t have LR becuse they have the same engine. Use the Tone Sliders and the Black and White Mix sliders to adjust the tones and to gain a well-balanced and contrasty B & W image.
1. The Tone sliders
2.The Black & White Mix Sliders.
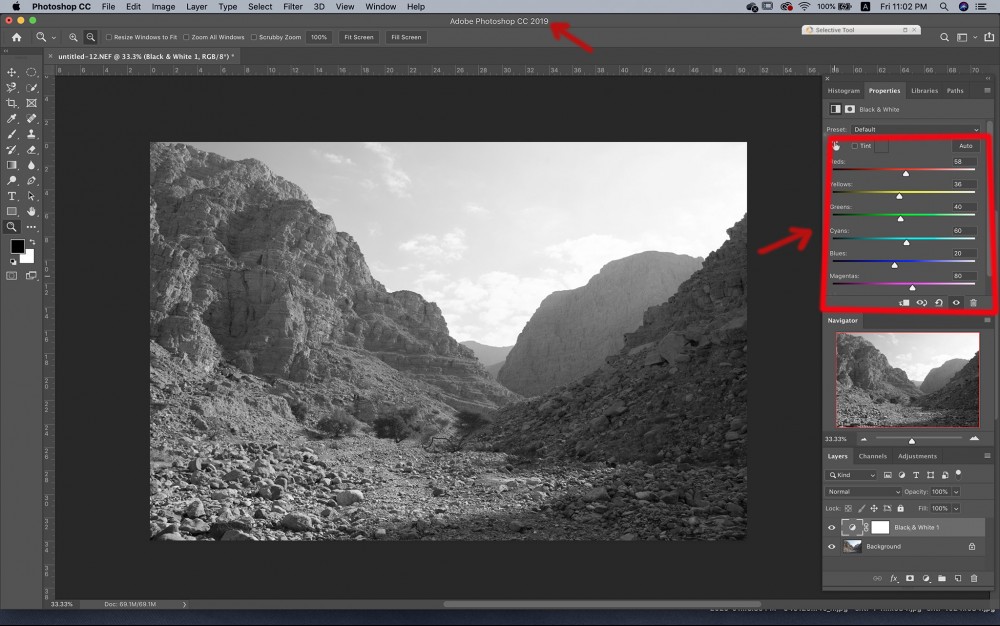
Photoshop(Adujustment Layers)
The below image shows the black and white adjustments layers used once you finish the basic adjustments in Camera Raw.
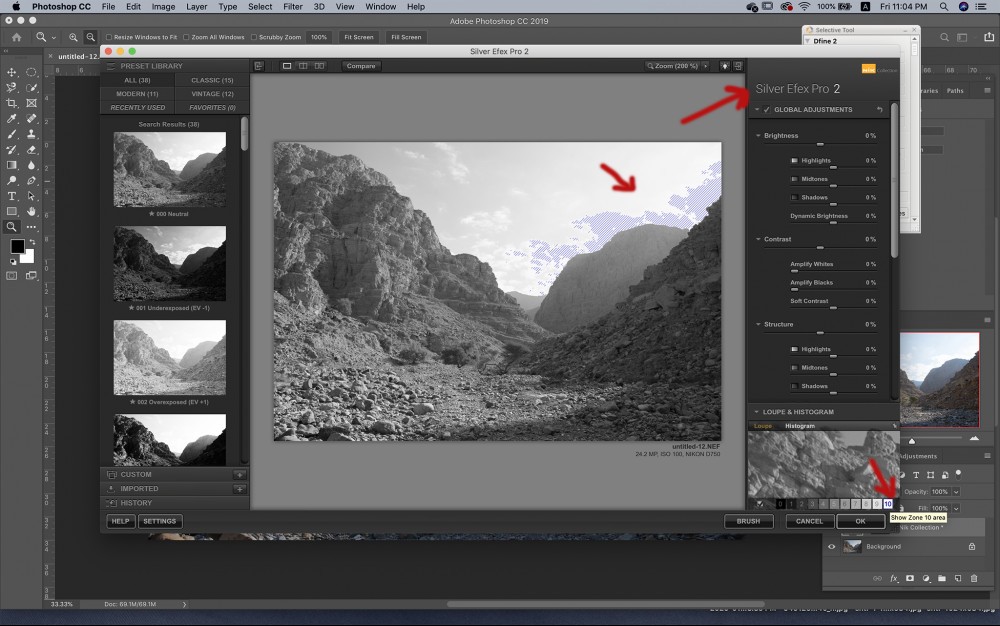
Silver Efex Pro 2
Silver Efex Pro 2 is a powerful tool. It includes many presets to be used as a starting point in the editing process.
You can use the system zone to adjust the amount of the light given to each zone locally. It would help if you played around with the sliders, Try also the Selective Adjustments, and the control points. That will give extra control as you will adjust only specific areas and not the entire photo.
So, Black and White Photography is inspiring and straightforward. Still, you need to understand how to get the right exposure as much as you can; you need to know about the zone system. In the post-processing, all the available software nowadays include the tone sliders where you can use it to create the contrasty image. Also, the B&W mix sliders do a great job, as shown above.